signtools4.com
Buy CorelDRAW & Get
SignTools 4 FREE

$799 AUD
including International Shipping
For more information click here.
Roland SV-8 Vinyl Cutter Setup instructions
SignTools Settings
After installing CorelDRAW the next step is to install SignTools. Follow the instructions on page 4 and 5 of the SignTools 4 User Guide.
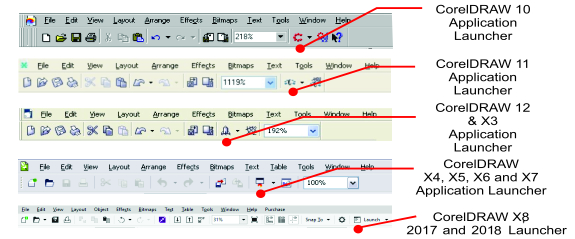
Once you have installed SignTools, open Corel Draw and click on the Application Launcher (see picture below) and choose SignTools 4.
Next click on the "Cut"
button and then the "Setup" button. Select the Roland Stika
SV-8 from the "Device" drop down box
and select your port.
USB Connection
If you are connecting
your cutter via a USB connection you must install the Roland driver
that came with your cutter first. This will create a an extra USB
port that you can select in the SignTools "Cut Settings" dialog box.
CorelDraw Settings
In CorelDraw's Layout menu select Page Setup. A dialog
box will appear. Set Width to 1000mm (39.4 inches) and Height to
160mm (6.3 inches).
Ensure that you are using a Landscape page.
To set this as a default page in CorelDRAW click on the Tools menu and choose Options. Click on the word Document on the left hand side and ensure all of the options are ticked and click on the OK button.
To cut any object in CorelDraw, simply place on the page in the bottom left corner. If you wish to cut in a portrait fashion simply rotate your graphics.
Additional note
SignTools 4 cuts from the bottom left of the page
either
manually place object(s) in the bottom left of the CorelDRAW page
or use the "Vinyl Saver" tool with the sliding bar all
the way to the left.
Further support
If you have followed these instructions and are still having problems setting up your vinyl cutter go to our support page and fill in the Support Enquiry Form.